Tuesday, February 28, 2012

Gimme that Base!

Sometimes finding the right eyeshadow base can feel like big game hunting on the Moon. Impossible.
Creaseless eye art is the goal, and I've found a couple contenders you may want to try.


Benefit Cosmetics Stay Don't Stray
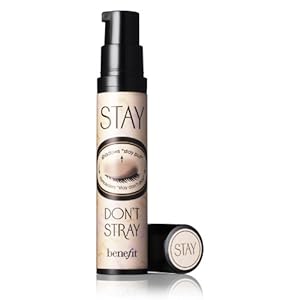
Photo courtesy of BeneFitCosmetics via Amazon
 Stay Don't Stray by BeneFit Cosmetics

1. The Good: Cost is $26 US so it's affordable. Available online and in department stores such as Ulta, Sephora, most Macy's, BeneFit Cosmetics, Amazon.com, etc. The texture is liquidy. Easily spreads with finger or cream shadow brush and keeps the eyelids oil free. You can use any type of shadow on it; cream or powder or cream to powder or loose shadow. It keeps your shadow on and if you can use it under your eye, it keeps your concealer in line as well. It color corrects so you may end up using less under eye concealer in the first place.

2. The Meh: It comes in a pump, so you will end up using too much until you get used to the "half pump" and even then, you'll end up with too much. Additionally, you can't see how much product you have left so if you run out mid-application, you're out of luck. It only comes in one color so if you have a tan or are darker complexted, you're in trouble. It'll end up looking chalky and dry and no matter how much you try to color correct, it doesn't blend out. You're stuck. Because of the pump, extra bits of product leak out and can make a bit of a mess. It can be difficult to blend your dry powder shadow if you don't have a light hand.

3.The Verdict: If you have the time and patience to work with it, travel a lot and need to have products that double their use, and are very fair skinned; Stay Don't Stray is fine for you. However I do recommend stopping into a store to physically see and feel the product for yourself.


Laura Mercier Eye Canvas
Photo courtesy of Laura Mercia via Amazon.com
 Laura Mercier Eye Canvas

1. The Good: Cost is $26 US. Available online and in department stores such as Sephora, some Macy's, Amazon.com, LauraMercier.com, Nordstrom, etc. Five colors are available right now. Spreading a thin amount of the creamy base creates an almost magnet-style attraction for eyeshadow. You end up with a true to color result for your shadows. Cream, powder, cream to powder and loose powder shadows work well on this shadow base. Brightens and color corrects the lid, removing any redness and creating a good neutral-skin colored canvas for your colours of choice. Dries down quickly so there's no waiting to put on your eyeshadow. It's easy to blend your eyeshadow on this product even if you accidently get a little heavy handed. The wear is fantastic, I checked my shadow application after 15 hours and my look never faded!

2. The Meh: Though it comes in 5 colors, the color range doesn't go deep. So the same applies here; you could end up with a chalky look if you don't use it sparingly and have a deeper complexion. If you don't have a cream shadow brush, you can use your finger but you'll use too much. Trust me. Plus, you don't want to put your finger into the container, the oils from your fingers break down the product. The pot is glass and the lid plastic which means if you drop it just right you could end up with a shattered eyeshadow base or a cracked lid and the product is garbage bound.

3.The Verdict: I love this product! I recommend testing it yourself to find the right color, but other than that, GO GO GO! I purchased the EC1 (the lightest shade), and it brightens and makes the eyespace look more open. The texture is lovely and creamy, doesn't drag on the tender skin of the eyelid and you can't argue with results. It worked so well after a particularly trying evening of karaoke, dancing around like a maniac and of course, adult beverages; I was thoroughly impressed. Not a single greasy-lookin' crease and the colors were the same as when I first applied it. Highly recommended!


What counts the most is that your eyeshadow base does it's job: keep your eyeshadow looking the way you want it until you want to take it off. If what you use right now (or if you don't use any) isn't cutting it; give one of these two a try! You might find a whole new world in your pallette of shadows once your base is doing it's job.

Tuesday, February 21, 2012

Even the best look has got to go!

Down the drain of course!
You never, and I mean never want to sleep in your makeup. I don't care how "natural" it is, don't sleep in it! Especially your eye makeup. I've long grimaced at bi-phase makeup removers (the kind you have to shake-shake-shake) but I've found one that meets my demands. 1. Affordable and available. 2. Does the job. 3. Doesn't burn my eyes.

Enter in L'Oreal Paris Clean Artiste Waterproof & Long Wearing Eye Makeup Remover.
Photo courtesy of lorealparisusa.com

A little shake to activate, a cotton round (or cotton ball, whatever your preference) and you are ready to take off the art you beat on your eyes. It takes off even the most stubborn waterproof eye shadow, liner or mascara, including the marvelous CoverGirl 24 hour Mascara I wrote about previously. It takes a little swiping, but the effort in removal isn't nearly as difficult as putting on the makeup in the first place!

There was a little residue, but it was nothing the Baby Shampoo Tip I wrote about couldn't make quick work of.

Even with my contacts on, I didn't experience any burning. At all! I was shocked! Normally with a bi-phase remover there's some sort of burning or irritation, however mild. I thought maybe I wasn't getting all the makeup off, but nope. I got it all and my eyes were perfectly fine. Major points!

The cost varies, the suggested retail price is $6.99 US, I believe I got mine for under $6. Now, there's little to no excuse not to take off that makeup!

Saturday, February 18, 2012

Hydration Happiness

Heavy moisturizers. They come in jars and I've avoided them for most of my life. They have such a negative reputation. The greasy, heavy feeling, no thanks!
However I was looking for a moisturizer with a little more oomph and I came across Abyssine Cream Plus by Kiehls. On the pricey side, at $48 US, however this little sucker is fantastic!!


Photo straight from Kiehls.com, here's their deets:
•Anti-wrinkle defense cream to help reduce the signs of aging and protect skin from external damage.
•Abyssine, a survival molecule which thrives under the extreme conditions in hydrothermal ocean vents, helps soothe and protect skin. 
•Helps minimize the appearance of fine lines and wrinkles while defending skin from free radical damage.
•Dermatologist-tested and suitable for sensitive skin.

Super. But what does it mean??

What it means is a small amount works itself effortlessly into the skin with no greasy afterfeel!! Skin feels hydrated and soft without the weight associated with most "creams". I didn't have to wait for it to absorb to begin my makeup. The texture is dense but whipped. Which doesn't make sense but when you feel it for yourself, you'll see how quickly it spreads and absorbs into your skin. It smells terrific too!  Not flowery, but light and fresh.

Have I noticed any difference in fine lines or wrinkles? No, but I wasn't looking for them in the first place really. I wanted something that felt good and had value. I found it. A little dip with a Q-Tip and away I go! *Little known fact, you never want to touch your jarred creams, like eye cream. The oils from your hands can break down the product when it's left in the jar.*

If you're starting to look at your moisturizer and think, "What have you done for me lately??"; do yourself a favor and get yourself some Abyssine Cream Plus by Kiehl's. It's perfect for day or night or both! The beauty of Kiehl's is if you can get into a store (A Kiehl's Store or department store like Nordstroms) , they will almost always let you have a sample to take home. If they don't have any samples, you can open the tester and touch the product yourself which I always recommend. 

So there's the little gem that's been making my face feel amazing for a little over a year (one jar lasted me about 6 months!). I couldn't be happier with it!

Friday, February 17, 2012

How-to: Tightlining. The better way to line your eyes.


Eyeliner, is not just for the top of the eyelid anymore! Well, it hasn't been for some time, but the Tightlining Method isn't as popular as it should be.

What is Tightlining?
Tightlining accentuates the existing lashline by coloring the space between the eyelashes. It allows for more room on the eyelid for color (helps those of us with "hooded" eyes) and gives a more natural emphasis than a pencil or powder liner. Sounds hard you may be thinking; it's not. It's surprisingly easier to master with the right tools and a just a little practice.

The Tools You'll Need
Originally, I was taught the Tightlining method with a pencil, wet to dry eyeshadow, brush and water. The result was great. Incredibly messy, but great. The pencil and wet/dry shadow thickened the base of the lashes and made the lashes mimic false eyelashes. Then the process was consolidated to a cake eyeliner which was fantastic, until the cake liner formula was changed and now it crumbles and flakes. Boooo! What oh what to do?? Most conventional liquid eyeliners come in some sort of brush-in-handle combination where the brush is built for top of the eyelid application. Doesn't help for tightlining.

I found an alternative! Actual liquid liner, no brush included in the cap! For about $20 US, the MakeUpForever Aquarelle paint is perfect. It wears great due to Film Forming PVP Polymers, translation? The pigments dry down and bond quickly which means minimal flaking and long wear without being waterproof. Why don't I want waterproof tightliner? Because waterproofing agents can irritate your eye. The Tightlining technique puts the liner right near the eye. Unless you want to be rubbing your red eyes all day, you want to avoid irritants.

The brush below is a must. Believe me, I've tried and tried to find something similar and every brush I've tried has failed compared to the Mercier brush. The brush itself is about $24 US, but it was absolutely worth every penny. The bristles are thin and flat enough to get right where you need to. Other brushes that may look similar almost always end up being too square or too thick or too flimsy. This brush was MADE for this technique. It's one that use every day and I've had it for over 8 years. Washing it is easy, just don't squish it and it'll bounce right back to the flat and thin shape you need.


Lightbox_1329540994533.jpeg
The Tools I use.
Lightbox_1329541150371.jpg What's in the cap should be enough for both eyes. 
Lightbox_1329541232167.jpeg Use the back of your hand as a pallet! It's the perfect spot, plus you'll wash your brush and your hand after your done anyway.
Lightbox_1329541361878.jpeg Using your lashes to guide you, take the flat brush and wiggle the bristles in between the lashes. Think of it as coloring in the spaces between them.
Lightbox_1329541458448.jpeg Go back to your pallet as needed, keep the brush thin and flat so you can get between each section. Keep going until you finish the whole lash line.
Lightbox_1329541563526.jpeg See? Like this. Sometimes I "blink down" onto the brush, but not a full blink! Just enough to put a little pressure on the brush and get the eyeliner liquid in between the lashes.

Lightbox_1329541846956.jpeg Now a quick curl of the lashes and some mascara and all done! 
Lightbox_1329541897952.jpeg As you can see, the eyelid is liner free, but my eyes are still defined!
  The befores.
Lightbox_1329541846956.jpeg Lightbox_1329541897952.jpeg The afters! Quite a difference, right?? And no other makeup, including concealer or eyeshadow base was used!


Tightlining is very easy once you get a hang of it. My tricks are to look down into a mirror, that way I can see without having to try and hold my eyelid up and wiggle the brush into my lashes. A handheld mirror has become my super friend for that.
Also, when you're just beginning to tightline, do it first! You can always put your concealer or eyeshadow base over any oopsies (I've done it) that you smudge on your lid. 

Tightlining looks great on everyone and is very easy to build on as far as whatever eyeshadow art you intend to do. From natural to cut creases, from shimmers to mattes! Tightlining is like a little black dress, it's perfect for every look!

Give it a try, see for yourself!

Tuesday, February 14, 2012

In the Land of Lash Curlers

Eyelash curlers. A tool that looks more like a contraption to remove the eyeball than a method of bending and shaping the eyelash. Most are frightened of yanking out all the lashes by the root, or weird looking dents framing their eye. A good general rule of using eyelash curlers:

  1. Do the "Bite-Bite-Bite". If you have no ever-loving clue as to what I'm saying, picture using the curler down the length of your lash, not just the base (nearest to the eyelid). Close and hold the curler at the base of the lash, hold for 3-5 seconds, then slowly and with a less pressure continue to open and close the curler moving down the lash. Use light pressure, as the hair gets thinner towards the tip and can curl too deep and will leave a kink.
  2. Curl your lashes before you put on mascara. Some people like to curl after mascara. In my experience this will result in clumping of mascara and ups the potential for ripping out eyelashes. The mascara thickens the hair and makes the hair catch on the metal/plastic of the curler. To avoid this, just curl beforehand.
  3. Don't be afraid to practice! If you're uneasy about curling your lashes, practice on bare lashes when you have no intention of putting on makeup. My suggestion? Before bed! Get yourself a mirror you can hold and practice! Rushing is the enemy of lash curling. Take your time and practice.
  4. Press and release, don't pull. Remember that you are in control of the curler, not the other way around. Don't pull up or away when the curler is depressed, only move the curler when it's open.
  5. Go slowly. If you pinch yourself, you're going too fast. Slow down. If you feel pressure like you're about to pinch yourself, stop! Open the curler again and adjust the placement.
  6. Clean your curler and replace the pads. Buildup on the curler is natural, as well as dents in the pads. Using a warm washcloth or a tissue, remove the residue. Bacteria can build up there, but it's more about the "ICK" factor than anything else. It looks gross and keeps the curler from functioning properly, a nice even surface is optimal. The padding will dent. It's inevitable. Most of the curlers I've used have come with replacement pads that are easy to remove and replace. Also, the life of an eyelash curler isn't long. 6 - 8 months at best. Thankfully they are fairly affordable so it doesn't hurt the pocketbook too much.

Let's look at the some basic models:


Revlon Cushion-Grip Lash Curler Eyelash Curlers
Revlon Cushion-Grip Lash Curler    

Revlon Eyelash Curler


Revlon Cushion-Grip Lash Curler  and Revlon Eyelash Curler. These two curlers from Revlon are good basics and fairly priced. The only difference between them? The grip. One has a rubber lining, the other doesn't. It's really about preference at that point. I've used both and can say they are user friendly.


For the brave:


Japonesque Precision Lash Curler - Plastic
Tweezerman Super Curl Eyelash Curler
Tweezerman Super Curl Eyelash Curler   


Tweezerman Super Curl Eyelash Curler   - The Tweezerman Super Curl being clear plastic is helpful allowing you to see where the plate is going and how close you're getting to your lashline. Also if you need to turn the curler and angle it, it helps to see where your going. (I like to make sure the outside lashes get extra curled, so I angle the curler on my eye to catch every outside corner. The outer lashes in the curler, the others not.)

Japonesque Precision Lash Curler - Plastic - The Japonesque Precision is terrific too, it's more comfortable for someone doing makeup on another person, but it takes longer to use. Using it yourself is easy, but it takes longer because you are going section by section. You can get deep curl easily from inner to outer lashline.

Once your lashes are curled, you are ready for your mascara. My choice at the moment is, as I wrote before, the CoverGirl Lash Blast 24 hour Mascara in Very Black because it keeps the curl integrity until you remove it.

Happy Curling Everyone!

Thursday, February 2, 2012

My little Pony - tail


Like many of you, I've struggled with dents, knots and tangles of hair wrapped impossibly around my hair bands for years. YEARS. Well NO MORE!

On a whim, I ordered these Ribbon Hair Ties by Sephora Collection months ago and I HAVE BEEN CONVERTED!

No longer do I have to struggle with the metal menace associated with most ponytail holders. You know what I'm talking about. That little demon connector that can make removal painful. Now there are "tag free" options and plastic bands as well, but those can snap or become so hopelessly stretched and tangled they must be physically cut out of your hair. And that, is. Awful!

These Ribbon Hair Ties are fashionable and tangle free (unless you REALLY try) and the soft pliable ribbon still hold even when active. I really like them, at $8.00 US for a pack of 8, they last too! When they do lose their shape, all you have to do is run them under some water, let air dry and they bounce right back! I have yet to have one snap or come undone. I bought some more just so that I have more color options.