Showing posts with label easy. Show all posts

Saturday, June 27, 2015

Eye and lip products from COLOUR POP!

After seeing several Youtube Beauty Guru's posting videos on this new line of cosmetics, I decided to look into Colour Pop cosmetics. It seemed too good to be true; great color payoff, long wear, all for under $10 a piece??? BUT IT SEEMS TO BE TRUE! I went ahead and ordered 3 shadows and 2 lip sticks, the swatches are below.

Colour Pop Super Shock Shadows are super cushiony. It's almost like putting your finger on velvet pudding mousse. Because of their formula, you have to keep the lid on tight. Like the box says "Keep the magic in, close jar tightly after use" and I can completely understand why. These are the softest shadows I've ever felt! They can be used with fingers or with synthetic brushes. They recommend using the finger first to give better color payoff then blending out. I can't wait to play around with them other than the swatches! 

The first eyeshadow is Bill (on the left). It's a very soft almost fleshy-warm toned muted brown taupe. It comes off as almost pink. It's going to be a great wash color or transition crease color

 
The next color is simply spectacular. It's called Cricket. Normally I don't go for glittery/shimmer shadows, but this one just called to me. It's a gorgeous purple/wine metallic that is going to be stellar as a mobile lid wash of color.
The third shadow I got was Girl Crush. A muted  and dusty blue based taupe (think I love a good taupe?? YES) it almost comes off as a gray that will be a good transition or crease color. Though I'm thinking I could use it on it's own as a color wash too!
NEXT TO LIPPIES! I LOVE lipsticks that are easy to put on and build, each was swatched 3x to get the full color payoff. The tubes are skinny like a pen, slanted for easy precision and are twist ups. SO GREAT! The pigments are great, I can't wait to see how long they wear!

First up is Button. An easy neutral coral, I can easily see myself wearing this throughout the Summer into Fall. Very wearable but not nude, gives a good color for my fair skin. (Don't be fooled, for some reason I look tan in these pictures, I'm really pale in person.)

As I was shopping, I came across Frida. On the website it's billed as a "A warm mid tone nude pink with a satin finish" and that's true, but on ME it's much brighter, as you can see next to Button. It's coming across much more Pink Lemonade and it's SO CUTE! I love how it's so solid and playful, it's just warm enough to really show off my lips without a ton of effort.
So here's the swatches in a different light to try and show the beautiful colors, top to bottom: Bill, Cricket, Girl Crush, Frida lippie and Button lippie. 
Each eyeshadow and lippie were $5 US each. THAT'S IT. FIVE BUCKS!! When I placed my order, they had a free shipping with every $30 order in the US so SCORE! Colour Pop is made in Los Angeles so it was only a few days wait until my order showed up at my mailbox. I'm really looking forward to wearing all of these! 

And CHECK THIS OUT (from the Colour Pop website)

PS. We are 100% fur baby friendly, bunny approved, and only test our products on humans – the ones in our HQ to be exact.


How great is that??? Go check out Colour Pop and take a look! You might find out you love this line as much as I do!

Wednesday, June 3, 2015

Solving acne: The Easy Way


I've never been shy about my experience with acne. Whiteheads, blackheads, the dreaded cystic. I've had it all and even as an adult, continue to have to deal with these f*ckers.
All my weapons against zits have been topical and over the counter. I've been to a dermatologist, but for my eczema, not for acne, so I haven't gone through the hardcore prescription stuff like Accutane or Cortisol shots, but I have had major struggles. Especially with Cystic Acne and especially when I was a teenager. I have always been willing to try anything to help.

If you've been lucky enough to never have had a cystic acne experience, I envy you, but I'll explain what they feel like. They are hard, start deep under the skin, seem to take weeks to come to a head, they throb and are so painful! There's no head to extract or try to pop or lance; you wish you had a needle because if you could just get that stuff out of there the pressure would ease and give you relief! But just because there's no visible head, doesn't mean they are invisible! Ohhh no! The skin is swollen and raised for what seems like months. Then, if you are able to get it to come to a head and manage to pop it? IT GETS WORSE! The wound takes forever to heal! You try and get all the "ick" out, if you can get the sack you consider yourself lucky; however I've had cluster cystic acne before and let me tell you, no matter how hard you try, you just aren't going to get all the sacks the first time so the infection gets worse and it's just heinous. Blech! 

Topical/over the counter spot treatments can help, but they dry out the top layers of your skin which causes redness and flaky skin, making the acne more pronounced and sometimes more painful.
Sheesh!
I don't get the cystic acne as much as I used to, but I do still get them (and other spots). And now I have a new weapon in my arsenal.
Cut up piece of bandage!
Hydrocolloid Bandages.

What are those???
Hydrocolloid Bandages are blister band-aids! You know, those ones you use on your foot if your shoes are too tight/too loose and you wind up with a blister across the back of your heel? Yeah! Those!
I was watching one of my favorite YouTubers Rachel Whitehurst (she's awesome, but she cusses, be warned) and what she said blew my mind! Apparently she had been alerted to these helpful little beauties via Tumblr.
I immediately went to Ebates.com and placed an order for the Target Brand bandages, went and picked them up at my local Target (YAY site to store pickup!) and gave them a try.
Now, I didn't have a cystic zit at the time, I DID have a whitehead zit that had just surfaced and naturally I didn't take a picture of it. Because I had the dumb that day.
BUT I did what Rachel had suggested, I cut the bandage to fit (I actually made sure that the fattest part of the bandage was on the zit part) and stuck that sucker on there. I left it overnight and let me tell you that white part was completely gone the next morning!
I COULDN'T BELIEVE IT!All that was left of that zit was a bit of redness that was easily covered up by my tinted moisturizer! IT'S A MIRACLE!

Ok, peeling off the well worn sticker wasn't painless, it is VERY sticky so it pulls at any teeny hair, but it's easier if you wash your face a bit first, then peel it off, then wash your face like you normally would.

How did that work???
The bandage was made to draw out moisture and any infection from a blister while cushioning the skin and not leaving it dried out. So yeah, it's pretty much the perfect product for acne that is too stubborn to rise to a head but too deep to apply anything topical to kill the infection! Now, the trick is to leave the bandage on as long as possible, that way it draws it all up into the bandage material; but walking around with a weird piece of flesh colored bandage may not be possible. So leave the piece on as long as you can, then peel it off to see if the blemish can be dealt with (extracted or treated topically). If yes, then do your thing, but if you don't want to risk scarring, leave the hydrocolloid on until you get the result you want. I didn't experience any itchiness or anything, and frankly, you know how everyone tells you "KEEP YOUR HANDS OFF YOUR ZIT" and you still touch it? Yeah, I felt confident that I could touch the bandage and NOT make my zit worse! A FIRST!

There are other options of hydrocolloid bandages available too! 
If you don't want to cut the pieces yourself, you can go to Amazon.com and try the Nexcare or Hydra-Band versions of a hydrocolloid bandage; these are pre-cut into varying sized circles so it's a
"peel and stick" option. I haven't tried those, and frankly the Target brand bandage that I have to cut is so much cheaper I don't mind cutting them to fit the size I need. 

So there! Something new to try that is inexpensive and fairly easy to obtain that won't cause the damage and scarring the old ways of dealing with your acne have been! Let me know if you try it and what your experiences are!

Thursday, May 7, 2015

WHICH COLOR?? Why choose just one??


  Last night, I decided my nails needed a color change. So I dug into my collection* (I have way waaaaaay too many nail polishes, I had to get a storage system...) and started grabbing colors. I ended up with 5 in the same color family and the same brand.
Butter London lacquers are fantastic, they go on beautifully, (I put on 3 coats of each just to have complete coverage) and I've never had a problem with any of them.
The list of colors, from pinkie to thumb are:

Snog, Trout Pout, Dahling, MacBeth and Jaffa.

My entire nail routine is as follows: Melt-Away Cuticle Eliminator by Butter London, then I push back my cuticles (gently!) and nip them with the Mini Nail Rescue Kit by Tweezerman from Ulta.com, then I use OPI Chip Skip to clean my nails. Then I use OPI Original Nail Envy to treat my nails, since they tend to bend and peel on their own. I use Orly Bonder rubberized basecoat, it's the best one I've tried, it helps me keep the polish ON my nail instead of all over my finger. Two or three coats of my chosen color, then this amazing topcoat Glisten & Glow fast drying topcoat which works even faster than the Seche Vite topcoat but without the "pulling" on the polish (when the polish pulls back from the tip and exposes the nail underneath). And it's incredible! It dries fast enough that I can paint all 10 nails, then go straight to bed. I love it! 

My nail polish usually lasts 4-5 days, if I'm not impatient and change them first, which is nearly always the case!

The lacquers were purchased by me via EBATES and Ulta.com, and the topcoat was purchased at Glisten & Glow

Monday, May 4, 2015

HAIL TO THE LIPSTICK QUEEN


Does anyone else remember the "mood" lipsticks? They came in bright primary colors and turned a much different color on the lips? They looked cool, but they were terribly dry and waxy on the lips.
BEHOLD! 
Lipstick Queen has brought back the concept with Frog Prince. Bright Kelly/Emerald green in the tube, this super emollient lipstick feels more like the best lip balm you've ever had and gives you a flattering rosy hue, specific to your body's ph level. Because SCIENCE!
What the brand says:
"Get heads turning with Frog Prince, a remarkable emerald green lipstick that transforms into magical rosebud upon contact with the lips. Don't be fooled by the deep green hue of this semi-sheer lipstick - the green reacts with the warmth of your lips turning them an intense, fairy tale rose. No two pairs of lips will look the same as it adapts according to your pH and natural coloring, appearing entirely different yet beautifully flattering on everyone. Vitamin E and Shea Butter keep lips soft, hydrated and deliciously kissable. And just like true love itself, this enchanting shade was made to last. Lips remain their blissful pink all day long from just one lingering, magical Frog Prince kiss.
  • Moisturizing Shea Butter and anti-oxidant Vitamin E soothe and protect
  • Glossy, wet formula wears into a gentle, flattering and long-lasting pink tint
  • Unique to you – Frog Prince adapts according to your pH and skin tone to create your most flattering shade of pink"
What I say:
Yeah! I would have to agree with them! The formula can't be beat when it comes to hydration. The product is sheer, but turns the skin an opaque color, which works like a stain so it gives you super long lasting color payoff! 

Below, you can see the original tube, the green product with the rosy pink packaging. The packaging is a pink metallic with a rubberized grip around the sides. It's very pleasant to the touch and easily found in a makeup bag! The top right pictures is me putting on the product, then directly under is a few seconds after, you can just make out the color starting to turn! 
I gave the product time to fully develop, about 15 minutes, then took another picture. Voila!
The color deepened, I'm not wearing any lip liner or gloss, and I'm loving it! Though the color isn't coming out in the picture, like I'd like. But that could be user error with the green background, you get it though, right???


I purchased the lipstick via EBATES and Ulta.com.
I really enjoy making money back when I use ebates, use the link above (yes I get credit) and sign up! Especially when the lipstick is $25 (US)! So sign up, you'll see what I mean!

Tuesday, October 22, 2013

What's in the Box?? (October 2013)


Guys, I've been meaning to confess, I've been a subscriber to Birchbox for a few months now.

Voraciously watching my email for my notification of "your box has shipped!" and checking and double checking the tracking link until my box arrives and I can tear into it like Christmas Morning. IT'S SO FUN!

I haven't been too excited about any of the boxes, some of the products have been fine. The random nail polish, the random lip color, etc. None have really caught my attention quite as well as two of the five products I received for October.


This Month's Box
My October Birchbox (photo from Birchbox.com)

Beauty Queen 900x900
photo from Birchbox.com
I'm familiar with The Balm Cosmetics, having purchased a concealer pot from them several years ago and never hitting pan no matter how much I used it. Which, is incredible. So even though I knew their products were great and affordable, I never really purchased more.

I might actually buy this when I run out!

The Balm Staniac is a little tube, about the size of a cotton swab, of cherry colored jelly with a doe-foot applicator that is easily used as a lip stain or cheek stain.  Yes the tube is small for a price point of $17, BUT it travels better than the fantastic lip and cheek stain BeneTint by BeneFit. (Which is widely recognized as the best lip & cheek stain)
photo from Birchbox.com


I'm a big fan of lip balm, BIG fan. From my first swipe of a LipSmacker, I was IN. But ChapStick, never really was appealing to me. Too waxy, smelled weird, etc.

This little beauty, ChapStick Hydration Lock, was a special "find" from Birchbox. Which means it wasn't really a part of the monthly box, but IT SHOULD HAVE BEEN! 

 Reluctantly, I opened the package and swiped on the product and was instantly impressed! My lips felt smoother but not waxed over (a huge complaint of mine for ChapStick products) and they looked smoother! I've been battling with a super dry and flaky patch on my lower lip for weeks and the ChapStick Hydration Lock completely obliterated the look of it! And did so for at LEAST 4 hours. Which to me, is an eternity when it comes to lip balm reapplication!

The product states that the "flavor" is Vanilla Creme, but I couldn't smell or taste anything. I'm probably desensitized by my use of the EOS lip balms. 
There is no price point on Birchbox.com for this product since it's a "find", but I'm sure you could find it in your local drugstore or box store.


I can't wait to see what's in my next Birchbox!!


Thursday, May 2, 2013

The Essentials: A Solid BB Cream and a GREAT brush? What a concept!

I've been a fan of the BB Cream, specifically SmashBox BB Cream in Light. So when a solid/cream form of my favorite almost-foundation I was desperate to get my little hands on it!

Enter in Too Faced Air-Buffed BB Creme Complete Coverage Makeup! It's got the lightweight feel of a BB Cream and tinted moisturizer (once applied), but the coverage is so much better! It's build-able but still feels like there's barely anything on my skin! And you can't argue with the result:

On the LEFT: My bare face. On the RIGHT: My face with the BB Creme!

You can see the major difference! My skin looks smoother, more uniform without looking flat. The redness is virtually non-existent with the Too Faced BB Creme! AWESOME! The color that matched my skin was Vanilla Glow.

The Air-Buffed BB Creme comes with a little brush that clicks directly into the top of the cap. Convenient? Yes! Did I want to use it all the time? Nope. It'll do in a pinch, but with regular wear, I was going to need something more substantial.  To which I purchased a Real Techniques Expert Face Brush from Ulta and could not be happier. The brush is terrific, I highly recommend spending the $8.99 and picking one up. (Actually I bought 2! The price is so great, and you never can have enough good brushes!)

The Expert Face brush is synthetic fiber shaped in a short dome which makes applying creamy products absolutely effortless. Building the coverage of the BB Creme was easy; I just stippled some of the product where I needed the extra help then blended further out. The finish is a soft matte, so I  could set with a translucent powder or let it dry down on it's own. Voila! 

The BB Creme retails for $39 (U.S.) and comes in a small range of colors, only 5 to date that I could find. Which isn't the best, but it's what's happening right now. If the product sells well I hope the color options will increase. 

Recommendation: I say go check it out! Find your nearest retailer that carries Too Faced and see how the Air-Buffed BB Creme works with your skin! I purchased the products myself, and I love them!


Thursday, April 4, 2013

BIIIIIIG volume without needing earplugs!

I have thin hair, a lot of hair, but it's thin. It's also long, longer than it probably should be (...yeeeeah I really need a haircut) which means that it gets flat against my head pretty much daily.

Annoying!

I can hear you thinking "Duh, why not just backcomb it?" I'll answer, because I can't seem to do it successfully and I'm a hair-toucher. I have a tendency to run my fingers through my hair or touch it in some way, and if it's back combed my fingers get stuck and while that's hilarious to watch I'm sure, it's not very awesome.

I've used volumizing shampoo, conditioner, gel, mousse, and *deep breath* even a Bump-It to try and get a lift outta my locks!

One day while shopping at Ulta, I came across Got2b Powder'ful Volumizing Styling Powder and thought "Well, I like hair powders, I'll give it a shot!"

I AM SO GLAD I DID!

The good: It's relatively inexpensive (I paid $5.99 plus tax US) and while the bottle is very small and yeah, I shook several bottles to make sure that I wasn't buying an empty bottle, the product is virtually weightless in the container! It's not really powdery, the only way I can describe it is "teeny-tiny-plumping plastic". It feels like gum in your hair, but dry. HEAR ME OUT!! I know, "gum in your hair??? GROSS!" except it FATTENS your hair and changes the texture to what I can only describe as able to hold up the Moon. Plus you hardly need any to get the height and texture you want.

The wacky: It feels weird! It shakes out like powder, but looks like teeny tiny granules. When you go to "emulsify" it between your hands, it doesn't disperse. It disappears.  But it's still there, the texture is on your fingers now, so you can place the product directly at the root of your hair with your fingertips. This takes a bit of getting used to. You can also try and lightly shake the product onto the roots of your hair, but it's harder to control and you might wind up dumping a bunch onto your noggin. (...yes, that happened to me)

The meh: You really can only use it the one time as you're getting your style together. It bulks up the hair so much, you will have a hard time re-styling should you change your mind and want to curl or brush or comb through your hair. Once it's in there, it's IN there. You can't really style around it, or at least I couldn't, but my hair is long so maybe that was part of the problem.

The verdict: This stuff is AWESOME! Once I got used to how it worked, I found it easy! And it is completely undetectable! Unlike dry shampoos that can leave a white residue or colored residue depending on the brand you're using, this product VANISHES completely. I really like it! 

Monday, November 12, 2012

Nightstand Treats: Cuticle Oil

Hi there! It's been quite the while since I've posted, sorry. Stuff gets in the way of other stuff and so on.

I've been meaning to post about this marvelous little beauty, Handbag Holiday by butter LONDON for some time. I was privy to an express manicure at the butter LONDON salon at SeaTac Airport, where I made my purchase. (I took advantage of the 2 treatments for $25) The treatment retails for $18 US and can be purchased at Nordstroms, Ulta.com, butterLONDON.com, etc.


This lightweight oil, smells delicious and doesn't even need to be rubbed in to be effective. Which is terrific because, cuticle treatments past have been goopy and sticky and a pain in the rear, at least in my opinion.
I love this mineral oil free oil as my last step before I drift off to dreamland. Keeping the bottle on my nightstand is a good reminder to use it. A simple brush-brush-brush over my nail-beds and I'm set. I haven't noticed a residue on anything like my sheets or pillowcase, but I haven't been looking either.
The cuticle oil absorbs quickly, but yes it's an oil so you can't slather on a ton and rub your eyes. Less is more, and you don't need to dip back into the bottle often to get more product.
My cuticles look hydrated in the morning and I'm quite pleased with my pampering purchase!

With the holidays looming, or for an anytime present to yourself or your favorite nail enthusiast; Handbag Holiday is an easy choice.

Wednesday, September 19, 2012

Tinfoil: It's not just for hats anymore!

I can't remember which Pinterest link I saw that clued me into this gem of a tip. But I do fully credit Pinterest!
I saw a pin regarding glittery nail polish easily, tried it and discovered that it works with EVERY polish!

Here goes: (follow the pictures left-to-right, top to bottom)
You're going to need tinfoil, cotton balls or pads and nail polish remover. I use Acetone because it's cheap.
Pull a decent length of tinfoil, enough to make a long rectangle when folded in half length ways. Then fold end over end, creating a smaller rectangle. Tear the rectangles off, then tear them again, repeat until you've got a decent stack of tinfoil rectangles.


Soak the cotton ball in acetone, place it on your nail. Take a foil piece, start wrapping your nail, making sure you wrap as tight as you can. Sealing the foil around your finger as much as you can. I wrap once, then fold the end up, then wrap the rest around my finger. Continuing that process until your whole hand is silver tipped is awkward. But I find the appearance to be funnnnnnny, reminiscent of Family Holiday dinners where my cousins would put olives on their fingertips!

I wait 1-2 minutes, then gently pull off the tinfoil fingertip, pushing/pulling a little to make sure all the polish attaches. And Presto! No more polish! No back and forth! You're done!
So there you have it! An easy way to quickly change your polish!

Thursday, August 16, 2012

Just call me Pinky-lee!!


Ok, don't really call me that. I just looove this Pink combination!

Both are China Glaze colours. Dress Me Up is the pink I reviewed earlier. The glitter is Material Girl, and lemme tell ya, it is GLI-TTER-Y!! Multiple sizes of glitter gives a terrific saturation of the sparkly stuff. I had to use it to cover the entire accent nail because I haven't mastered the gradient glitter application look...but I'm trying!!

Both were purchased via Amazon.com because of the free shipping (you have to shop around to find it sometimes) or low shipping costs. Both were under $5 and included free shipping.

What do you think? Do you like it??

Wednesday, August 15, 2012

No More Arm Bumps? Awesome!

Hi everyone! It's been a busy summer hasn't it? Have you been neglecting your skin? No no, not the skin on your face, but your body??? All those scrubs and lotions and the sunblock/sunscreen I know everyone has been slathering on: well, if you're like me, you can get little bumps on your arms or legs. It's annoying.

I was first turned on to this little potion by the lovely Cora of VintageOrTacky.com (HI CORA!!!) and at the very next opportunity I rushed to the store to get myself my own bottle.

Enter in CeraVe Renewing Lotion. A body lotion with salicylic acid, ceramides and vitamin D (as per the bottle). The Salicylic Acid helps break down and improve the "slough off" factor of your skin, improving the texture slowly. Which is the real key. If you scrub and scrub and scrub your skin raw, you are going to have softness for about an hour, but then the roughness comes right back because you've scratched the surface of your skin. Literally. Breaking down the cells slowly and evenly improves the texture overall and for a longer run.

I've only been using it for about 2 weeks, every other night because frankly, I forget. It's been hot and the thought of putting anything on my skin that wasn't icy-chilled was an abysmal thought. I have noticed a reduction in the bumpies on my arms and my elbows seem to be softer, score!!


Now, this stuff does not come cheap. The 8 oz bottle (above) cost me about $16 with taxes and that's at a regular box store (Wal-Mart). Ouch. Fortunately, a little goes further than you'd think. One short pump and I was able to saturate my entire arm and it absorbs fairly quickly. 

Because it's a chemical exfoliant, using the CeraVe before bedtime is optimal. There's very little scent, so there's no real risk of offending yourself or a loved one. I'm betting you could probably layer on a nighttime lotion (your Lavenders, your Chamomile scented lotions) but I would use them sparingly. You don't want to negate the good stuff in the CeraVe.

The following day, you can use your regular lotion (I recommend Alba Botanica Very Emollient Body Lotion) but it's my opinion that you should also be adding sunscreen to your regimen. You can knock both off by using Lubriderm Daily Moisture Lotion with SPF 15.

Whatever you do, treat your skin well, it's got to last you for your life!

Friday, June 29, 2012

And the new WEN Summer Scent is....

MANGO COCONUT!!
And it is WONDERFUL!

I got my new WEN scent from qvc.com yesterday and could not wait to use it!
Much to my surprise; the stronger note in the bottle is the MANGO and not the coconut! I thought for sure I would smell like suntan lotion/the beach experience upon using the shiny new concoction, but no! The scent is strongly fruity, but not super sweet. Unlike other WEN scents, this one lingers long after. The smell is sweet but not overly so. Completely lovely!

photo courtesy of qvc.com community picture
My recommendation? If you're already a WEN fan, give it a shot! I'll be ordering another bottle soon.

Thursday, June 28, 2012

Stained your nails? EASY fix!

Have you ever used a dark or colorful nail polish, then after taking it off eventually you discover *GASP* your nails are stained BIG TIME?

Me too! My best friend (HI SCHMOOPS!!) gave me a terrific tip on how to remove the stain with minimal effort but maximum results:

Lemon juice and baking soda! That's it!
Spoon or dump some baking soda into a bowl, then add lemon juice and mix until you make a liquidy paste. It should feel very gritty, but not dry. You need it to stay liquid for ease of use. Then, dip your fingertips into the grit and massage your finger tops with opposing hands. Just like you would wash your hands normally.

It takes about 3 minutes, then wash your hands! Repeat if necessary, but I only needed to do it once and my darkly stained nails were pristine! (Naturally I didn't take a before or after picture of my nails. Frankly because I didn't think it would work as well as it did!)

The clean-up is as easy as every other step. And it's cheap! You probably have the elements in your kitchen already. Give it a shot! You won't be disappointed!


Tuesday, June 19, 2012

Don't forget your Top Coat!

If I hadn't purchased and tried this product for myself, I wouldn't have believed it.

Enter in Seche Vite fast dry top coat!
When it says fast, it means FAST! After applying two coats of nail color on each nail, starting at my pinky I applied one coat of the Seche Vite to each nail and by the time I was finished with my second hand, THE FIRST HAND WAS DRY TO THE TOUCH!! I'm not even kidding! Not "sticky" or "tacky". Slick and dry! (Granted, if you stab the polish, you're going to nick it still)

I first tried the top coat ten minutes before leaving for a night out; by the time I'd reached for my car keys I was marveling at my freshly painted fingertips and picking my jaw up off the floor that they were DRY!

I can paint my nails with regular polish, use the top coat and go straight to bed! Anyone who's learned the hard way that wet polish and bedtime equals ruined manicure by morning knows what I'm talking about.

Not with this little beauty!

Pricing varies, I suggest shopping around. I relied on my trusty amazon.com and was not disappointed.

The only downsides were the smell being very chemical and if I have a small cut it burns burns burns! Honestly, any polish burns when that happens.

To maintain my finger paint, I alternate days of application. Putting some OPI Nail Envy on first then the quick coat.

I highly recommend this top coat!


Sunday, June 10, 2012

Matte about my nails!

Ok, admittedly I'm not the greatest at painting my own nails. And the picture below only confirms it, however I have meant to write up the Essie Matte About You top coat.for awhile and showcase it over a dark enough polish to show it off.
The solid blue is a non-shimmer blue creme from MAC, specifically the Wonder Woman collection that was limited. The matte top coat makes the polish look like paper, and gives it a papery texture too. One coat is all you need to turn the tables on your regular nail color. The drying time is minimal, when it looks matte, it's basically dry. It's like having a brand new drawer of polish options! Plus, because it's a top coat, you can change up your polish on a whim and change back to shiny and glossy really quickly and easily!
Ordering from Amazon.com is the best way I've found, the prices are competitive so you can get a fantastic deal!

Monday, May 28, 2012

A little Lip service

Inspired by a Facebook post by my darling friend, Anne (aka Muse Mama) I decided to give a little Lip service! Lip color that is!

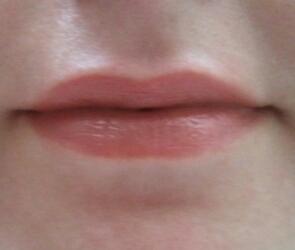
Here's my lips, with nothing on them; naked as lips can get.
I didn't even put any regular lip balm on like EOS or Burt's Bees!


I've been a big fan of lip tints for a long time. Sometimes a lipstick can be too hard looking, and a gloss can fade away too fast. I'm happy to report that Revlon ColorBurst Lip Butter are a beautiful alternative to both!

Rich in texture like a lipstick, but creating a gliding and slick-smooth surface like a gloss with a terrific hydration and decent wear; bonus, Revlon ColorBurst Lip Butters come in 20 shades! TWENTY! That's a LOT of choices, my friends! Playing it safe, I purchased two of the Lip Butters. Pink Truffle and Red Velvet.
(Pink Truffle is on the left in the product picture but on the right in the swatch; Red Velvet is on the right in the product picture and on the left in the swatch)

Pink Truffle is in the pink family, but it's more muted than it is baby or bubble gum pink. I found it to be my go-to when I just want a little color. It's a good "bare but not" look.
Revlon ColorBurst Lip Butter in Pink Truffle
With no liner needed, it gives a fuller appearance without being overbearing. 

To kick it up and frankly, the name just made me grab it with my hot little hand; here's Red Velvet. A blue red that's got a sheerness that makes it easy to wear with or without liner (this is without). Also, I found that layering Red Velvet over another more "blah" color like a brown-ish neutral really boosts the look of the original color.
Revlon ColorBurst Lip Butter in Red Velvet

As you can see, it's totally wearable on it's own as a daily as well. The pigment is stronger in person, but don't be afraid to use it on the fly! The colors slightly deepen with more layers, but not by much so it's not like you have to have a light hand applying them.

These are my two favorites and the ones that I think are good starters for those who are leery of lip products. They cost about $7 US and can be found at most major box retailers like Target, Wal-Mart, etc.


Saturday, April 14, 2012

The Essentials: A good foundation


Foundations are tricky. The newest foundation trend is Beauty Balm, aka B.B. cream. There have been an influx of brands from drugstore to department store suddenly shouting "BB CREAM"! What is BB cream?

It's a cross between tinted moisturizer and foundation. Typically lightweight and quick drying. Working quickly is a must with BB cream. A sponge or brush isn't necessary nor is it recommended (personally) since the pigments blend out easily and evenly with just the fingertips. Additionally, a small amount, seriously the diameter of a chick-pea, is all you need for an application.

I bought the Smashbox BB cream in Light.

Here is the swatch with the approximate amount needed to cover the face. When I say "cover the face" what I mean is you start in the middle (nose/T-zone) area and blend out to your cheeks, then up and down onto the forehead and chin areas. Don't go crazy and try and put BB cream on like a regular foundation. It's not. Take a look for yourself!


Here is the before: I know, pore issues. But relatively even skin with just a little redness on my cheeks. 
And here is the end result before powder. 
BB cream definitely helps to tone down any redness immediately and give a smoother look with very little effort.


BB cream can be used as primer as well, I've yet to try it since I've found the coverage is exactly what I wanted. Something light that looks like skin but as near perfect as possible.
At $39 US, the Smashbox BB cream is pricey, but I liked the fact that so little is needed for results which means I'll be using this BB cream well into the summer and possibly fall seasons.

Have you tried any BB creams? Any thoughts or questions? Feel free to ask!

Monday, March 26, 2012

Nailing it!


These are one of my favorite Sally Hansen Salon Effects Nail Strips I previously wrote about.

This set is called "Love Letter" and it is just lovely, it looks like an old handwritten letter and it's one of my favorite non-holiday related strips.

The popularity of the nail strips is making me really happy since they are so much easier to apply and maintain than regular liquid polish. The range of color and pattern for Sally Hansen vary store to store during each season, however Love Letter seems to be one of the staples. I'm glad because I thought it was limited to the February-Valentines patterns.

Tuesday, February 21, 2012

Even the best look has got to go!

Down the drain of course!
You never, and I mean never want to sleep in your makeup. I don't care how "natural" it is, don't sleep in it! Especially your eye makeup. I've long grimaced at bi-phase makeup removers (the kind you have to shake-shake-shake) but I've found one that meets my demands. 1. Affordable and available. 2. Does the job. 3. Doesn't burn my eyes.

Enter in L'Oreal Paris Clean Artiste Waterproof & Long Wearing Eye Makeup Remover.
Photo courtesy of lorealparisusa.com

A little shake to activate, a cotton round (or cotton ball, whatever your preference) and you are ready to take off the art you beat on your eyes. It takes off even the most stubborn waterproof eye shadow, liner or mascara, including the marvelous CoverGirl 24 hour Mascara I wrote about previously. It takes a little swiping, but the effort in removal isn't nearly as difficult as putting on the makeup in the first place!

There was a little residue, but it was nothing the Baby Shampoo Tip I wrote about couldn't make quick work of.

Even with my contacts on, I didn't experience any burning. At all! I was shocked! Normally with a bi-phase remover there's some sort of burning or irritation, however mild. I thought maybe I wasn't getting all the makeup off, but nope. I got it all and my eyes were perfectly fine. Major points!

The cost varies, the suggested retail price is $6.99 US, I believe I got mine for under $6. Now, there's little to no excuse not to take off that makeup!

Friday, February 17, 2012

How-to: Tightlining. The better way to line your eyes.


Eyeliner, is not just for the top of the eyelid anymore! Well, it hasn't been for some time, but the Tightlining Method isn't as popular as it should be.

What is Tightlining?
Tightlining accentuates the existing lashline by coloring the space between the eyelashes. It allows for more room on the eyelid for color (helps those of us with "hooded" eyes) and gives a more natural emphasis than a pencil or powder liner. Sounds hard you may be thinking; it's not. It's surprisingly easier to master with the right tools and a just a little practice.

The Tools You'll Need
Originally, I was taught the Tightlining method with a pencil, wet to dry eyeshadow, brush and water. The result was great. Incredibly messy, but great. The pencil and wet/dry shadow thickened the base of the lashes and made the lashes mimic false eyelashes. Then the process was consolidated to a cake eyeliner which was fantastic, until the cake liner formula was changed and now it crumbles and flakes. Boooo! What oh what to do?? Most conventional liquid eyeliners come in some sort of brush-in-handle combination where the brush is built for top of the eyelid application. Doesn't help for tightlining.

I found an alternative! Actual liquid liner, no brush included in the cap! For about $20 US, the MakeUpForever Aquarelle paint is perfect. It wears great due to Film Forming PVP Polymers, translation? The pigments dry down and bond quickly which means minimal flaking and long wear without being waterproof. Why don't I want waterproof tightliner? Because waterproofing agents can irritate your eye. The Tightlining technique puts the liner right near the eye. Unless you want to be rubbing your red eyes all day, you want to avoid irritants.

The brush below is a must. Believe me, I've tried and tried to find something similar and every brush I've tried has failed compared to the Mercier brush. The brush itself is about $24 US, but it was absolutely worth every penny. The bristles are thin and flat enough to get right where you need to. Other brushes that may look similar almost always end up being too square or too thick or too flimsy. This brush was MADE for this technique. It's one that use every day and I've had it for over 8 years. Washing it is easy, just don't squish it and it'll bounce right back to the flat and thin shape you need.


Lightbox_1329540994533.jpeg
The Tools I use.
Lightbox_1329541150371.jpg What's in the cap should be enough for both eyes. 
Lightbox_1329541232167.jpeg Use the back of your hand as a pallet! It's the perfect spot, plus you'll wash your brush and your hand after your done anyway.
Lightbox_1329541361878.jpeg Using your lashes to guide you, take the flat brush and wiggle the bristles in between the lashes. Think of it as coloring in the spaces between them.
Lightbox_1329541458448.jpeg Go back to your pallet as needed, keep the brush thin and flat so you can get between each section. Keep going until you finish the whole lash line.
Lightbox_1329541563526.jpeg See? Like this. Sometimes I "blink down" onto the brush, but not a full blink! Just enough to put a little pressure on the brush and get the eyeliner liquid in between the lashes.

Lightbox_1329541846956.jpeg Now a quick curl of the lashes and some mascara and all done! 
Lightbox_1329541897952.jpeg As you can see, the eyelid is liner free, but my eyes are still defined!
  The befores.
Lightbox_1329541846956.jpeg Lightbox_1329541897952.jpeg The afters! Quite a difference, right?? And no other makeup, including concealer or eyeshadow base was used!


Tightlining is very easy once you get a hang of it. My tricks are to look down into a mirror, that way I can see without having to try and hold my eyelid up and wiggle the brush into my lashes. A handheld mirror has become my super friend for that.
Also, when you're just beginning to tightline, do it first! You can always put your concealer or eyeshadow base over any oopsies (I've done it) that you smudge on your lid. 

Tightlining looks great on everyone and is very easy to build on as far as whatever eyeshadow art you intend to do. From natural to cut creases, from shimmers to mattes! Tightlining is like a little black dress, it's perfect for every look!

Give it a try, see for yourself!