Showing posts with label basics. Show all posts

Wednesday, July 22, 2015

My first Influenster VoxBox!

SO EXCITING! If you haven't heard of this thing called Influenster;
you aren't alone. I hadn't either until I watched Bailey Van Der Veen on youtube. After that, I signed up, answered a few questions and waited.

Quite a while. 
HOWEVER, much to my surprise, I GOT THIS BOX! Inside were 5 products (4 full sized!) and two sets of coupons, one to get a products for free and 3 for $3.00 off a purchase. WOW!! 

Sinful Colors nail polish, Dickensen's face wipes, Vaseline Aloe spray on lotion, Blue Diamond Almonds snack pack and an Infusium 23 hair treatment; ALL FOR FREE!! I haven't tried any of them yet, but I'm looking forward to it! 

You can click on the link above, or the gadget on the right to sign up! I'll be reviewing the products soon, but until then, enjoy!


Saturday, June 27, 2015

Eye and lip products from COLOUR POP!

After seeing several Youtube Beauty Guru's posting videos on this new line of cosmetics, I decided to look into Colour Pop cosmetics. It seemed too good to be true; great color payoff, long wear, all for under $10 a piece??? BUT IT SEEMS TO BE TRUE! I went ahead and ordered 3 shadows and 2 lip sticks, the swatches are below.

Colour Pop Super Shock Shadows are super cushiony. It's almost like putting your finger on velvet pudding mousse. Because of their formula, you have to keep the lid on tight. Like the box says "Keep the magic in, close jar tightly after use" and I can completely understand why. These are the softest shadows I've ever felt! They can be used with fingers or with synthetic brushes. They recommend using the finger first to give better color payoff then blending out. I can't wait to play around with them other than the swatches! 

The first eyeshadow is Bill (on the left). It's a very soft almost fleshy-warm toned muted brown taupe. It comes off as almost pink. It's going to be a great wash color or transition crease color

 
The next color is simply spectacular. It's called Cricket. Normally I don't go for glittery/shimmer shadows, but this one just called to me. It's a gorgeous purple/wine metallic that is going to be stellar as a mobile lid wash of color.
The third shadow I got was Girl Crush. A muted  and dusty blue based taupe (think I love a good taupe?? YES) it almost comes off as a gray that will be a good transition or crease color. Though I'm thinking I could use it on it's own as a color wash too!
NEXT TO LIPPIES! I LOVE lipsticks that are easy to put on and build, each was swatched 3x to get the full color payoff. The tubes are skinny like a pen, slanted for easy precision and are twist ups. SO GREAT! The pigments are great, I can't wait to see how long they wear!

First up is Button. An easy neutral coral, I can easily see myself wearing this throughout the Summer into Fall. Very wearable but not nude, gives a good color for my fair skin. (Don't be fooled, for some reason I look tan in these pictures, I'm really pale in person.)

As I was shopping, I came across Frida. On the website it's billed as a "A warm mid tone nude pink with a satin finish" and that's true, but on ME it's much brighter, as you can see next to Button. It's coming across much more Pink Lemonade and it's SO CUTE! I love how it's so solid and playful, it's just warm enough to really show off my lips without a ton of effort.
So here's the swatches in a different light to try and show the beautiful colors, top to bottom: Bill, Cricket, Girl Crush, Frida lippie and Button lippie. 
Each eyeshadow and lippie were $5 US each. THAT'S IT. FIVE BUCKS!! When I placed my order, they had a free shipping with every $30 order in the US so SCORE! Colour Pop is made in Los Angeles so it was only a few days wait until my order showed up at my mailbox. I'm really looking forward to wearing all of these! 

And CHECK THIS OUT (from the Colour Pop website)

PS. We are 100% fur baby friendly, bunny approved, and only test our products on humans – the ones in our HQ to be exact.


How great is that??? Go check out Colour Pop and take a look! You might find out you love this line as much as I do!

Thursday, May 7, 2015

WHICH COLOR?? Why choose just one??


  Last night, I decided my nails needed a color change. So I dug into my collection* (I have way waaaaaay too many nail polishes, I had to get a storage system...) and started grabbing colors. I ended up with 5 in the same color family and the same brand.
Butter London lacquers are fantastic, they go on beautifully, (I put on 3 coats of each just to have complete coverage) and I've never had a problem with any of them.
The list of colors, from pinkie to thumb are:

Snog, Trout Pout, Dahling, MacBeth and Jaffa.

My entire nail routine is as follows: Melt-Away Cuticle Eliminator by Butter London, then I push back my cuticles (gently!) and nip them with the Mini Nail Rescue Kit by Tweezerman from Ulta.com, then I use OPI Chip Skip to clean my nails. Then I use OPI Original Nail Envy to treat my nails, since they tend to bend and peel on their own. I use Orly Bonder rubberized basecoat, it's the best one I've tried, it helps me keep the polish ON my nail instead of all over my finger. Two or three coats of my chosen color, then this amazing topcoat Glisten & Glow fast drying topcoat which works even faster than the Seche Vite topcoat but without the "pulling" on the polish (when the polish pulls back from the tip and exposes the nail underneath). And it's incredible! It dries fast enough that I can paint all 10 nails, then go straight to bed. I love it! 

My nail polish usually lasts 4-5 days, if I'm not impatient and change them first, which is nearly always the case!

The lacquers were purchased by me via EBATES and Ulta.com, and the topcoat was purchased at Glisten & Glow

Monday, May 4, 2015

HAIL TO THE LIPSTICK QUEEN


Does anyone else remember the "mood" lipsticks? They came in bright primary colors and turned a much different color on the lips? They looked cool, but they were terribly dry and waxy on the lips.
BEHOLD! 
Lipstick Queen has brought back the concept with Frog Prince. Bright Kelly/Emerald green in the tube, this super emollient lipstick feels more like the best lip balm you've ever had and gives you a flattering rosy hue, specific to your body's ph level. Because SCIENCE!
What the brand says:
"Get heads turning with Frog Prince, a remarkable emerald green lipstick that transforms into magical rosebud upon contact with the lips. Don't be fooled by the deep green hue of this semi-sheer lipstick - the green reacts with the warmth of your lips turning them an intense, fairy tale rose. No two pairs of lips will look the same as it adapts according to your pH and natural coloring, appearing entirely different yet beautifully flattering on everyone. Vitamin E and Shea Butter keep lips soft, hydrated and deliciously kissable. And just like true love itself, this enchanting shade was made to last. Lips remain their blissful pink all day long from just one lingering, magical Frog Prince kiss.
  • Moisturizing Shea Butter and anti-oxidant Vitamin E soothe and protect
  • Glossy, wet formula wears into a gentle, flattering and long-lasting pink tint
  • Unique to you – Frog Prince adapts according to your pH and skin tone to create your most flattering shade of pink"
What I say:
Yeah! I would have to agree with them! The formula can't be beat when it comes to hydration. The product is sheer, but turns the skin an opaque color, which works like a stain so it gives you super long lasting color payoff! 

Below, you can see the original tube, the green product with the rosy pink packaging. The packaging is a pink metallic with a rubberized grip around the sides. It's very pleasant to the touch and easily found in a makeup bag! The top right pictures is me putting on the product, then directly under is a few seconds after, you can just make out the color starting to turn! 
I gave the product time to fully develop, about 15 minutes, then took another picture. Voila!
The color deepened, I'm not wearing any lip liner or gloss, and I'm loving it! Though the color isn't coming out in the picture, like I'd like. But that could be user error with the green background, you get it though, right???


I purchased the lipstick via EBATES and Ulta.com.
I really enjoy making money back when I use ebates, use the link above (yes I get credit) and sign up! Especially when the lipstick is $25 (US)! So sign up, you'll see what I mean!

Friday, March 20, 2015

Beauty Battleground: Mascara Wars

Normally, I would provide documentation for my findings, but frankly I'm so irritated at the results of my mascara head-to-head that I'm setting aside my instinct to take pictures of the results to just go on tirades.

The Products:

Benefit Cosmetics Rollerlash Mascara - purchased at Sephora.com 
- product claim (from sephora.com): Bye-bye, eyelash curler! Roller Lash not only lifts and super-curls, but this instant curve-setting formula holds for 12 hours, is easy to remove, and contains provitamin B5 and serine, known for their lash-conditioning benefits.

Mirenesse iCurl Secret Weapon 24 Hour Mascara from Birchbox subscription
- product claim (from birchbox.com): This jet-black mascara is like Taylor Swift at the Grammys—it just keeps on winning. This award-winning favorite from the Aussie brand is leading the pack, and for good reason. It separates, lifts, and curls lashes for some serious, long-lasting drama.


http://skepchick.org/wp-content/uploads/2013/09/no__9gag__by_hujikari-d51hu4l.jpgskepchick.org
The final battle findings:
 
Neither one of these mascaras did what it claimed!
In the interest of fairness, I attempted to use each for a week. Both on uncurled lashes and curled lashes. I got the same lame results with both!
My lashes were stick straight, clumpy, flat/no volume whatsoever. BOOOOOO! The Mirenesse was a sample, so I'm just tossing it. But the Rollerlash? Yeah I spent good money on that! It's going back. Today.


 No matter what mascara I try, I still go back to THE BEST MASCARA I'VE EVER USED and am never disappointed.

What do you think? Is there a particular mascara that holds your devotion?

Tuesday, June 10, 2014

Eye've been busy - but here's a Two-Fer!

Terrible pun, but still.
I've made some purchases lately that I wanted to share. Both concerning eyes.
New Generation Eyelash s Curler
Photo from shueumura-usa.com   

Firstly, the new eyelash curler from Shu Uemura via the Ebates.com site, New Generation Eyelash S Curler. This oddly shaped curler is reminiscent of a Tweezerman for Laura Mercier curler from awhile back; the surface area is at least 1/3 of the size of a normal wide-mouthed curler and has a definite learning curve when it comes to use. 

Just like the "Bite Bite Bite" method from my previous post; start at the base or as close as you can maneuver the curler, you can use the top white pad as a guide (when you feel it touch your lid, stop!) or just eyeball it. Squeeze with a firm but slow pressure, then release softly, tilt your wrist up (thereby tilting the curler) slowly and do another short squeeze and repeat at least twice. You get SUCH a deep curl out of the S Curler! Because the actual surface area is smaller, it also allows for more precision which also translates into take your time when using this curler. Do NOT rush it! Yes, you can get into the inner and outer corners and curl just about every top eyelash you have, but if you rush you risk yanking out lashes in sections.

The Shu Uemura New Generation Eyelash S Curler retails for $24 US.


On to the next!

PHOTO FROM INGLOTUSA.COM
I've been searching for years, YEARS I TELL YOU, for polymer wrapped Tight-Lining product to NO AVAIL. 

Until now!!! This little beauty is the INGLOT AMC Eyeliner Gel in 77. It's a deep, DEEEEEEEEEP black with a putty-like look but an INK-LIKE texture! It's FANTASTIC! I was first turned on to it by YouTube User AnneThenSheSaid during one of her tutorials. She used it to make a fierce cut crease and by the look of it, I WANTED IT! I commented her video and asked if it was good for Tightlining (demonstrated in my previous post - How to Tight Line) and she told me it was GREAT and SHE WAS SOOOOO RIGHT!!!

I was STUNNED at how BLACK the eyeliner is and how creamy and easy to apply in the lash line! And let's have a half-second to talk about the price, on the INGLOT website, it retails for $12 US...I'm sorry, are those angels singing???? That's $12 US for 5.5g of pure black inked amazing-ness.

My only concern: it's really really inky. And you need an oily remover to get it off. Of ANYTHING. It took me a good 5 minutes to clean it off my hand and brush. It sets like crude oil. But I LOVE IT!!!


Below is a picture I took of my eye this morning, (sorry it's so yellow. I couldn't get the light to adjust right) I'm wearing the tiniest bit of eyeshadow (mainly because I accidentally pushed through my lashline while tightlining and COULDN'T GET THE SMUDGE OFF), the Inglot liner and mascara after curling my lashes with the S Curler. 

You can see, the curl is DEEEEEP y'all. The liner is solid and tight. And I fully expect all of it to stay that way ALLLLL DAY. 

(I also have my brow stuff on, but that's another post)


Has anyone else tried the S Curler or the Inglot Liner? I'm curious. There's 16 shades of liner on the Inglot site, including the most gorgeous red I've ever seen...obviously not for the faint of heart; also warm and cool purples, a teal that I'm drooling over and more!

Tuesday, May 6, 2014

Now this??

Ok, this is going to sound like a commercial...and it almost is.
I signed up with Ebates guys, and do you know what?
SEPHORA AND ULTA AND AMAZON AND TARGET are ON THERE!

I can't even tell you how dumb I feel having shopped directly from sites in the past. ALL THIS TIME I could have been racking up money and getting paid part of it back!! I FEEL LIKE SUCH A FOOL!!

When I first saw the commercials for Ebates.com, I thought "What a scam! It's probably for super obscure websites that I would NEVER shop." I'm gobsmacked, just about every online purchase I've made in the past year, I could have been earning part of my money back if I'd used Ebates.com.

I just barely signed up myself, but NOW IS THE TIME, they pay out quarterly, so you can start banking your bucks now! Also, you can have them send you a physical check or submit to your paypal account, love the options!

Anyway, here's the direct link too, it's my referral link so if you click and sign up (WHICH IS FREE AND SO SIMPLE IT'S ALMOST STUPID) that would be nice, there is a referral rewards program: http://www.ebates.com/rf.do?referrerid=gzzJ6d7juT1HBVaoQmmnaQ%3D%3D

I know, this isn't a product junkie post, but dudes...seriously??? MONEY!!

Wednesday, January 22, 2014

Beauty Blender vs Super Blender: What's the difference?

I did it. I finally bought a Beauty Blender. BUT NOT BEFORE I purchased a knock-off.
Allow me to explain.
A few months back I purchased the Super Blender Sponge from Ulta (which retails for $4.99 US), used it with a fairly heavy-duty foundation, and was very happy with the results.

But I couldn't help myself, around Christmas when the deals are-a-posting from everywhere, I saw a deal that I couldn't refuse. The Beauty Blender "Pure" WITH the solid cleanser bar, via amazon.com's Beauty Blender store for $23.95 (which isn't much of a discount, but it was enough to get me to the minimum dollar amount for free shipping, which is what I was really after). 

Beauty Blender with Solid Cleanser bar
Both sponges are to be used damp (run under water, squeezing a few times, then squeeze between a towel to get the right amount of damp) and then "bounced" or "pounced" on the skin rapidly, sectioning the face out to insure even application; which is a complicated way of saying Stippling. Both have a pointed end and a rounded end. The pointed end gives you better control of the little areas of the face that aren't flat, like the edges of your nose or under the eyes. Anywhere you usually have to use your finger to blend out. The flatter/rounded end is for the wider/flatter parts of the face, like the cheeks, forehead and top of the nose and chin. 

So what's the difference? One word. TEXTURE.
Sizes when dry and damp, very similar!
The pink Ulta sponge is more dense, even when dampened, and it sounds weird to say, but it makes more "noise" when you use it on your face. It sounded like it was a rubber ball bouncing on my face. Which almost put me off and simultaneously made me giggle. 
The Beauty Blender, once damp, was definitely softer. I did get worried that my foundation would be sucked into the center of it; but I was pleasantly surprised to realize that it didn't soak up as much as the pink Ulta sponge.

The resulting finish was fairly close for both; the big differences were that I felt I didn't use up as much foundation with the Beauty Blender as I did with the pink Ulta sponge, and when I washed the white Beauty Blender it seemed like anything that had gotten soaked up, was dispersed down the drain with that solid cleanser. When I washed the pink Ulta sponge, the water was pink-ish along with the foundation being washed out which means the dye washes out. Which freaks me out a little, but it's not a danger or anything.

Do you need this? Depends. Do you use liquid foundation? Do you find that you don't really like the finish of your foundation at the moment or that you're having to work really hard to get it the way you like it? Then maybe, yes. Personally, I really like the way the Beauty Blender and the Ulta Super Blender performed with my liquid foundation. But if you're content with a BB cream or tinted moisturizer then NO, you definitely don't need this. Otherwise it's up to you!

TIP: Go to YouTube and search how to use the Beauty Blender sponge properly BEFORE you purchase EITHER of these! You want to get a sense of "how" to use it before you buy it and then have absolutely no clue.

What do you think? Have you tried either? Did you have a terrible experience? Would YOU recommend either? 


Thursday, May 2, 2013

Contour? Bronzer? YES PLEASE TO BOTH!

I've been meaning to post about this next little gem for a month.
With summer (in this part of the hemisphere) threatening to burn us at every new dawn; it occurred to me "HOLY BIKES, I AM PALE!!" Normally this doesn't bother me, but now and again...YIKERS!
I'd been reading and seeing a lot of this next little beauty product for several weeks and decided, what the hey, I'll bite and try it and so far I'm very pleased!


CHANEL Soleil Tan de Chanel is a cream/gel bronzer that LOOKS scary but performs beautifully with minimal effort. I'd seen it used on Pixiwoo all the time. The more I saw it used, the more obsessed with it I became! I HAD TO HAVE IT. So I called up my nearest Macy's, connected to the Chanel counter and made sure they would have this must have item. With it being Spring, I really doubted they would have it in stock. Luckily for me, they did! At a hefty $48.00 (U.S.) this was a major purchase for me. Needless to say, I did a fair amount of research and testing before I laid my money down.

Much to my happy surprise, there's little to no shimmer! There is a teeny tiny amount, but it's not truly visible to the naked eye. It's more of a blurring element than a sparkle. The texture is dreamy; smooth and creamy, easily picked up with a dry brush, easily spread over bare skin or foundation (in my case I used it over this BB Creme and continue to be impressed by the results.
On the LEFT I used the Chanel Soleil Tan de Chanel as a contour (pre-blended, obviously); and on the RIGHT I used the same product with the same brush as a bronzer. The effect is much more subtle, you may not even be able to see the difference, but it's there. I promise.


Real Techniques - Expert Face Brush (I purchased at Ulta) is the perfect tool for the creamy bronzer. It's not-too-soft, not-too-hard synthetic bristles are almost stubby in the rounded shape but that is exactly what gives you all the control you need! I also used the same type of brush for my BB Creme, but to insure I keep the brushes separate, I painted the bottom of the brush handle with a gold nail polish to remind me this one is for BRONZER. With the brush price point of $8.99, having multiples of this brush is virtually guilt-free.


Recommendation: If you can afford it, I say go for it! The consensus in the vlog/blogosphere is that the product lasts for years and is easily used every day for every look. The blendability is off the charts; while being so emollient, it's not greasy at all which made me even happier with my purchase.


The Essentials: A Solid BB Cream and a GREAT brush? What a concept!

I've been a fan of the BB Cream, specifically SmashBox BB Cream in Light. So when a solid/cream form of my favorite almost-foundation I was desperate to get my little hands on it!

Enter in Too Faced Air-Buffed BB Creme Complete Coverage Makeup! It's got the lightweight feel of a BB Cream and tinted moisturizer (once applied), but the coverage is so much better! It's build-able but still feels like there's barely anything on my skin! And you can't argue with the result:

On the LEFT: My bare face. On the RIGHT: My face with the BB Creme!

You can see the major difference! My skin looks smoother, more uniform without looking flat. The redness is virtually non-existent with the Too Faced BB Creme! AWESOME! The color that matched my skin was Vanilla Glow.

The Air-Buffed BB Creme comes with a little brush that clicks directly into the top of the cap. Convenient? Yes! Did I want to use it all the time? Nope. It'll do in a pinch, but with regular wear, I was going to need something more substantial.  To which I purchased a Real Techniques Expert Face Brush from Ulta and could not be happier. The brush is terrific, I highly recommend spending the $8.99 and picking one up. (Actually I bought 2! The price is so great, and you never can have enough good brushes!)

The Expert Face brush is synthetic fiber shaped in a short dome which makes applying creamy products absolutely effortless. Building the coverage of the BB Creme was easy; I just stippled some of the product where I needed the extra help then blended further out. The finish is a soft matte, so I  could set with a translucent powder or let it dry down on it's own. Voila! 

The BB Creme retails for $39 (U.S.) and comes in a small range of colors, only 5 to date that I could find. Which isn't the best, but it's what's happening right now. If the product sells well I hope the color options will increase. 

Recommendation: I say go check it out! Find your nearest retailer that carries Too Faced and see how the Air-Buffed BB Creme works with your skin! I purchased the products myself, and I love them!


Monday, November 12, 2012

Nightstand Treats: Cuticle Oil

Hi there! It's been quite the while since I've posted, sorry. Stuff gets in the way of other stuff and so on.

I've been meaning to post about this marvelous little beauty, Handbag Holiday by butter LONDON for some time. I was privy to an express manicure at the butter LONDON salon at SeaTac Airport, where I made my purchase. (I took advantage of the 2 treatments for $25) The treatment retails for $18 US and can be purchased at Nordstroms, Ulta.com, butterLONDON.com, etc.


This lightweight oil, smells delicious and doesn't even need to be rubbed in to be effective. Which is terrific because, cuticle treatments past have been goopy and sticky and a pain in the rear, at least in my opinion.
I love this mineral oil free oil as my last step before I drift off to dreamland. Keeping the bottle on my nightstand is a good reminder to use it. A simple brush-brush-brush over my nail-beds and I'm set. I haven't noticed a residue on anything like my sheets or pillowcase, but I haven't been looking either.
The cuticle oil absorbs quickly, but yes it's an oil so you can't slather on a ton and rub your eyes. Less is more, and you don't need to dip back into the bottle often to get more product.
My cuticles look hydrated in the morning and I'm quite pleased with my pampering purchase!

With the holidays looming, or for an anytime present to yourself or your favorite nail enthusiast; Handbag Holiday is an easy choice.

Thursday, August 16, 2012

Just call me Pinky-lee!!


Ok, don't really call me that. I just looove this Pink combination!

Both are China Glaze colours. Dress Me Up is the pink I reviewed earlier. The glitter is Material Girl, and lemme tell ya, it is GLI-TTER-Y!! Multiple sizes of glitter gives a terrific saturation of the sparkly stuff. I had to use it to cover the entire accent nail because I haven't mastered the gradient glitter application look...but I'm trying!!

Both were purchased via Amazon.com because of the free shipping (you have to shop around to find it sometimes) or low shipping costs. Both were under $5 and included free shipping.

What do you think? Do you like it??

Monday, May 28, 2012

A little Lip service

Inspired by a Facebook post by my darling friend, Anne (aka Muse Mama) I decided to give a little Lip service! Lip color that is!

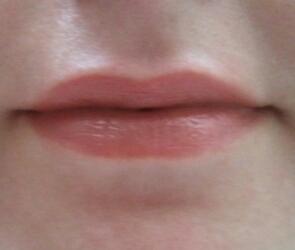
Here's my lips, with nothing on them; naked as lips can get.
I didn't even put any regular lip balm on like EOS or Burt's Bees!


I've been a big fan of lip tints for a long time. Sometimes a lipstick can be too hard looking, and a gloss can fade away too fast. I'm happy to report that Revlon ColorBurst Lip Butter are a beautiful alternative to both!

Rich in texture like a lipstick, but creating a gliding and slick-smooth surface like a gloss with a terrific hydration and decent wear; bonus, Revlon ColorBurst Lip Butters come in 20 shades! TWENTY! That's a LOT of choices, my friends! Playing it safe, I purchased two of the Lip Butters. Pink Truffle and Red Velvet.
(Pink Truffle is on the left in the product picture but on the right in the swatch; Red Velvet is on the right in the product picture and on the left in the swatch)

Pink Truffle is in the pink family, but it's more muted than it is baby or bubble gum pink. I found it to be my go-to when I just want a little color. It's a good "bare but not" look.
Revlon ColorBurst Lip Butter in Pink Truffle
With no liner needed, it gives a fuller appearance without being overbearing. 

To kick it up and frankly, the name just made me grab it with my hot little hand; here's Red Velvet. A blue red that's got a sheerness that makes it easy to wear with or without liner (this is without). Also, I found that layering Red Velvet over another more "blah" color like a brown-ish neutral really boosts the look of the original color.
Revlon ColorBurst Lip Butter in Red Velvet

As you can see, it's totally wearable on it's own as a daily as well. The pigment is stronger in person, but don't be afraid to use it on the fly! The colors slightly deepen with more layers, but not by much so it's not like you have to have a light hand applying them.

These are my two favorites and the ones that I think are good starters for those who are leery of lip products. They cost about $7 US and can be found at most major box retailers like Target, Wal-Mart, etc.


Saturday, April 14, 2012

The Essentials: A good foundation


Foundations are tricky. The newest foundation trend is Beauty Balm, aka B.B. cream. There have been an influx of brands from drugstore to department store suddenly shouting "BB CREAM"! What is BB cream?

It's a cross between tinted moisturizer and foundation. Typically lightweight and quick drying. Working quickly is a must with BB cream. A sponge or brush isn't necessary nor is it recommended (personally) since the pigments blend out easily and evenly with just the fingertips. Additionally, a small amount, seriously the diameter of a chick-pea, is all you need for an application.

I bought the Smashbox BB cream in Light.

Here is the swatch with the approximate amount needed to cover the face. When I say "cover the face" what I mean is you start in the middle (nose/T-zone) area and blend out to your cheeks, then up and down onto the forehead and chin areas. Don't go crazy and try and put BB cream on like a regular foundation. It's not. Take a look for yourself!


Here is the before: I know, pore issues. But relatively even skin with just a little redness on my cheeks. 
And here is the end result before powder. 
BB cream definitely helps to tone down any redness immediately and give a smoother look with very little effort.


BB cream can be used as primer as well, I've yet to try it since I've found the coverage is exactly what I wanted. Something light that looks like skin but as near perfect as possible.
At $39 US, the Smashbox BB cream is pricey, but I liked the fact that so little is needed for results which means I'll be using this BB cream well into the summer and possibly fall seasons.

Have you tried any BB creams? Any thoughts or questions? Feel free to ask!

Tuesday, February 28, 2012

Gimme that Base!

Sometimes finding the right eyeshadow base can feel like big game hunting on the Moon. Impossible.
Creaseless eye art is the goal, and I've found a couple contenders you may want to try.


Benefit Cosmetics Stay Don't Stray
Photo courtesy of BeneFitCosmetics via Amazon
 Stay Don't Stray by BeneFit Cosmetics

1. The Good: Cost is $26 US so it's affordable. Available online and in department stores such as Ulta, Sephora, most Macy's, BeneFit Cosmetics, Amazon.com, etc. The texture is liquidy. Easily spreads with finger or cream shadow brush and keeps the eyelids oil free. You can use any type of shadow on it; cream or powder or cream to powder or loose shadow. It keeps your shadow on and if you can use it under your eye, it keeps your concealer in line as well. It color corrects so you may end up using less under eye concealer in the first place.

2. The Meh: It comes in a pump, so you will end up using too much until you get used to the "half pump" and even then, you'll end up with too much. Additionally, you can't see how much product you have left so if you run out mid-application, you're out of luck. It only comes in one color so if you have a tan or are darker complexted, you're in trouble. It'll end up looking chalky and dry and no matter how much you try to color correct, it doesn't blend out. You're stuck. Because of the pump, extra bits of product leak out and can make a bit of a mess. It can be difficult to blend your dry powder shadow if you don't have a light hand.

3.The Verdict: If you have the time and patience to work with it, travel a lot and need to have products that double their use, and are very fair skinned; Stay Don't Stray is fine for you. However I do recommend stopping into a store to physically see and feel the product for yourself.


Laura Mercier Eye Canvas
Photo courtesy of Laura Mercia via Amazon.com
 Laura Mercier Eye Canvas

1. The Good: Cost is $26 US. Available online and in department stores such as Sephora, some Macy's, Amazon.com, LauraMercier.com, Nordstrom, etc. Five colors are available right now. Spreading a thin amount of the creamy base creates an almost magnet-style attraction for eyeshadow. You end up with a true to color result for your shadows. Cream, powder, cream to powder and loose powder shadows work well on this shadow base. Brightens and color corrects the lid, removing any redness and creating a good neutral-skin colored canvas for your colours of choice. Dries down quickly so there's no waiting to put on your eyeshadow. It's easy to blend your eyeshadow on this product even if you accidently get a little heavy handed. The wear is fantastic, I checked my shadow application after 15 hours and my look never faded!

2. The Meh: Though it comes in 5 colors, the color range doesn't go deep. So the same applies here; you could end up with a chalky look if you don't use it sparingly and have a deeper complexion. If you don't have a cream shadow brush, you can use your finger but you'll use too much. Trust me. Plus, you don't want to put your finger into the container, the oils from your fingers break down the product. The pot is glass and the lid plastic which means if you drop it just right you could end up with a shattered eyeshadow base or a cracked lid and the product is garbage bound.

3.The Verdict: I love this product! I recommend testing it yourself to find the right color, but other than that, GO GO GO! I purchased the EC1 (the lightest shade), and it brightens and makes the eyespace look more open. The texture is lovely and creamy, doesn't drag on the tender skin of the eyelid and you can't argue with results. It worked so well after a particularly trying evening of karaoke, dancing around like a maniac and of course, adult beverages; I was thoroughly impressed. Not a single greasy-lookin' crease and the colors were the same as when I first applied it. Highly recommended!


What counts the most is that your eyeshadow base does it's job: keep your eyeshadow looking the way you want it until you want to take it off. If what you use right now (or if you don't use any) isn't cutting it; give one of these two a try! You might find a whole new world in your pallette of shadows once your base is doing it's job.

Tuesday, February 21, 2012

Even the best look has got to go!

Down the drain of course!
You never, and I mean never want to sleep in your makeup. I don't care how "natural" it is, don't sleep in it! Especially your eye makeup. I've long grimaced at bi-phase makeup removers (the kind you have to shake-shake-shake) but I've found one that meets my demands. 1. Affordable and available. 2. Does the job. 3. Doesn't burn my eyes.

Enter in L'Oreal Paris Clean Artiste Waterproof & Long Wearing Eye Makeup Remover.
Photo courtesy of lorealparisusa.com

A little shake to activate, a cotton round (or cotton ball, whatever your preference) and you are ready to take off the art you beat on your eyes. It takes off even the most stubborn waterproof eye shadow, liner or mascara, including the marvelous CoverGirl 24 hour Mascara I wrote about previously. It takes a little swiping, but the effort in removal isn't nearly as difficult as putting on the makeup in the first place!

There was a little residue, but it was nothing the Baby Shampoo Tip I wrote about couldn't make quick work of.

Even with my contacts on, I didn't experience any burning. At all! I was shocked! Normally with a bi-phase remover there's some sort of burning or irritation, however mild. I thought maybe I wasn't getting all the makeup off, but nope. I got it all and my eyes were perfectly fine. Major points!

The cost varies, the suggested retail price is $6.99 US, I believe I got mine for under $6. Now, there's little to no excuse not to take off that makeup!

Saturday, February 18, 2012

Hydration Happiness

Heavy moisturizers. They come in jars and I've avoided them for most of my life. They have such a negative reputation. The greasy, heavy feeling, no thanks!
However I was looking for a moisturizer with a little more oomph and I came across Abyssine Cream Plus by Kiehls. On the pricey side, at $48 US, however this little sucker is fantastic!!


Photo straight from Kiehls.com, here's their deets:
•Anti-wrinkle defense cream to help reduce the signs of aging and protect skin from external damage.
•Abyssine, a survival molecule which thrives under the extreme conditions in hydrothermal ocean vents, helps soothe and protect skin. 
•Helps minimize the appearance of fine lines and wrinkles while defending skin from free radical damage.
•Dermatologist-tested and suitable for sensitive skin.

Super. But what does it mean??

What it means is a small amount works itself effortlessly into the skin with no greasy afterfeel!! Skin feels hydrated and soft without the weight associated with most "creams". I didn't have to wait for it to absorb to begin my makeup. The texture is dense but whipped. Which doesn't make sense but when you feel it for yourself, you'll see how quickly it spreads and absorbs into your skin. It smells terrific too!  Not flowery, but light and fresh.

Have I noticed any difference in fine lines or wrinkles? No, but I wasn't looking for them in the first place really. I wanted something that felt good and had value. I found it. A little dip with a Q-Tip and away I go! *Little known fact, you never want to touch your jarred creams, like eye cream. The oils from your hands can break down the product when it's left in the jar.*

If you're starting to look at your moisturizer and think, "What have you done for me lately??"; do yourself a favor and get yourself some Abyssine Cream Plus by Kiehl's. It's perfect for day or night or both! The beauty of Kiehl's is if you can get into a store (A Kiehl's Store or department store like Nordstroms) , they will almost always let you have a sample to take home. If they don't have any samples, you can open the tester and touch the product yourself which I always recommend. 

So there's the little gem that's been making my face feel amazing for a little over a year (one jar lasted me about 6 months!). I couldn't be happier with it!

Friday, February 17, 2012

How-to: Tightlining. The better way to line your eyes.


Eyeliner, is not just for the top of the eyelid anymore! Well, it hasn't been for some time, but the Tightlining Method isn't as popular as it should be.

What is Tightlining?
Tightlining accentuates the existing lashline by coloring the space between the eyelashes. It allows for more room on the eyelid for color (helps those of us with "hooded" eyes) and gives a more natural emphasis than a pencil or powder liner. Sounds hard you may be thinking; it's not. It's surprisingly easier to master with the right tools and a just a little practice.

The Tools You'll Need
Originally, I was taught the Tightlining method with a pencil, wet to dry eyeshadow, brush and water. The result was great. Incredibly messy, but great. The pencil and wet/dry shadow thickened the base of the lashes and made the lashes mimic false eyelashes. Then the process was consolidated to a cake eyeliner which was fantastic, until the cake liner formula was changed and now it crumbles and flakes. Boooo! What oh what to do?? Most conventional liquid eyeliners come in some sort of brush-in-handle combination where the brush is built for top of the eyelid application. Doesn't help for tightlining.

I found an alternative! Actual liquid liner, no brush included in the cap! For about $20 US, the MakeUpForever Aquarelle paint is perfect. It wears great due to Film Forming PVP Polymers, translation? The pigments dry down and bond quickly which means minimal flaking and long wear without being waterproof. Why don't I want waterproof tightliner? Because waterproofing agents can irritate your eye. The Tightlining technique puts the liner right near the eye. Unless you want to be rubbing your red eyes all day, you want to avoid irritants.

The brush below is a must. Believe me, I've tried and tried to find something similar and every brush I've tried has failed compared to the Mercier brush. The brush itself is about $24 US, but it was absolutely worth every penny. The bristles are thin and flat enough to get right where you need to. Other brushes that may look similar almost always end up being too square or too thick or too flimsy. This brush was MADE for this technique. It's one that use every day and I've had it for over 8 years. Washing it is easy, just don't squish it and it'll bounce right back to the flat and thin shape you need.


Lightbox_1329540994533.jpeg
The Tools I use.
Lightbox_1329541150371.jpg What's in the cap should be enough for both eyes. 
Lightbox_1329541232167.jpeg Use the back of your hand as a pallet! It's the perfect spot, plus you'll wash your brush and your hand after your done anyway.
Lightbox_1329541361878.jpeg Using your lashes to guide you, take the flat brush and wiggle the bristles in between the lashes. Think of it as coloring in the spaces between them.
Lightbox_1329541458448.jpeg Go back to your pallet as needed, keep the brush thin and flat so you can get between each section. Keep going until you finish the whole lash line.
Lightbox_1329541563526.jpeg See? Like this. Sometimes I "blink down" onto the brush, but not a full blink! Just enough to put a little pressure on the brush and get the eyeliner liquid in between the lashes.

Lightbox_1329541846956.jpeg Now a quick curl of the lashes and some mascara and all done! 
Lightbox_1329541897952.jpeg As you can see, the eyelid is liner free, but my eyes are still defined!
  The befores.
Lightbox_1329541846956.jpeg Lightbox_1329541897952.jpeg The afters! Quite a difference, right?? And no other makeup, including concealer or eyeshadow base was used!


Tightlining is very easy once you get a hang of it. My tricks are to look down into a mirror, that way I can see without having to try and hold my eyelid up and wiggle the brush into my lashes. A handheld mirror has become my super friend for that.
Also, when you're just beginning to tightline, do it first! You can always put your concealer or eyeshadow base over any oopsies (I've done it) that you smudge on your lid. 

Tightlining looks great on everyone and is very easy to build on as far as whatever eyeshadow art you intend to do. From natural to cut creases, from shimmers to mattes! Tightlining is like a little black dress, it's perfect for every look!

Give it a try, see for yourself!

Monday, January 30, 2012

So many brushes, how do you choose?

If you've ever wandered through a cosmetics department, you may have seen the utility belts stuffed full of makeup brushes strapped to the waists of makeup artists beating away at the faces of their clients. I've always loved a gorgeous set of brushes, but when I was one of those artists I understood the panic and confusion when a client would ask "but which brushes do I need?" I thought about it, and came up with a basic collection of three eyeshadow brushes for powdered eyeshadow (loose or pressed).
My favorite brand of brushes is Laura Mercier (all photos courtesy of LauraMercier.com) . While they aren't cheap, they are definitely the best brush for the long run. I've had my brushes for easily 8 years, and they are still in perfect shape with minimal maintenance.

First, is the Eye Colour Brush. It's a basic brush with flat and tapered bristles and an oval tip, ideal for applying all-over lid color and brow-bone highlight colors.
Eye Colour Brush


Next is the Eye Crease Brush. Rounded with tapered bristles, allows for easy application to and above the crease (for "hooded" lids) and makes blending easier than with similar softer brushes.


Lastly, my favorite brush is the Corner Eye Colour Brush. This brush helps create the most sought after "smokey" effect by allowing for definition and gradual layering. Holding the brush vertical and along the top lashline, sweeping from outer corner in towards the center of the eyelid, a bedroom eye-smokey lashline is quickly and easily applied with whatever deeper shades you choose. Additionally, it makes taking that same deeper powder shadow and making a soft undereye smoke effect effortless.


Creating intense or natural looks are easier than you think, especially if you have brushes that you know how to use. Patience and practice is always recommended for beginners and remember, less is always better. You can always add on color or intensity, it's impossible to take it away (though with blending you can get pretty damn close). Don't be afraid to play with your eyeshadow!